Monument Sign Installation
Specifically for the Cornerstone model, these signs are installed using a direct bury method.
Each monument sign is shipped with customized installation instructions.
A typical size and model of sign has been used for the following information.
Please speak with your consultant about any special installation considerations for your particular sign.
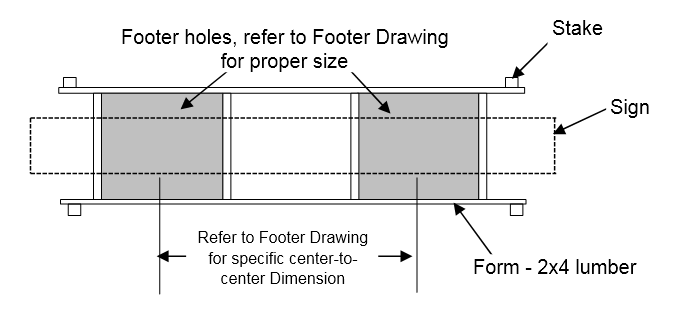
Preparing the Footer
- Dig the appropriate size hole or holes as indicated on your sign's footer drawing. Some sizes and models of signs only require one hole, while others require two.
- Using 2x4 lumber, create a single form that encompasses the hole(s). Refer to your footer drawing for exact dimensions.
- Recess the form into the ground so the top of the form is even with grade.
- Using a level, ensure that the form is level in all directions.
Top View of Footer Form (Constructed from 2x4 Lumber)
Installing the Sign
- Remove the sign from its crate.
- Lay the sign flat on a smooth surface.
- Unbolt and remove the mounting posts from the mounting sleeves.
- Reverse the mounting post (having it stick out from the sign) and reattach to the mounting sleeve plate.
- Place the sign onto the form with the mounting posts extending into the center of the footer holes.
- Check to ensure the sign is level and plumb. Use shims to adjust if necessary.
- Begin to add concrete to the footer holes.
- Keep the surface of the concrete 4 inches below grade to allow future access to mounting bolts.
- Use the bottom of the form as your full mark for the concrete.
- Allow concrete to fully set and remove forms.
- Using wood chips or other loose landscape material, backfill around the base of the sign.
